Pre requisites: DevOps , Docker
Continuous Integration (CI) and Continuous Development (CD) are the major areas in DevOps culture. Thus, Jenkins is a popular open-source Continuous Integration server written in Java which helps us to automate the process of Software Integration. Jenkins has over 1000 plugins that are available freely. These plugins help to integrate with various software tools for better convenience. We can hook it up with most of the repositories like SVN, Git, Mercurial, etc. For example, look at this image below: [1]
[1]
A huge project which needs Testing, Management, Deployment & Monitoring is manually not feasible as this would take a lot of time, effort and integration complexity. Jenkins is a powerful platform to carry out these activities automatically and lets us know if there are any bugs at the earlier stage of integration.
In this blog, we will learn to setup Jenkins at our local machines, create a CI pipeline and check how it helps with automation by taking a sample project.
A. Installation & Setup of Jenkins :
Software requirements: Ubuntu 22.xx
To demonstrate how to use Jenkins to test an application, we will be using a simple “hello world” program created with Hapi.js. Because we are setting up Jenkins to react to pushes to the repository, you need to have your own copy of the demonstration code. We’ve added a 'Jenkinsfile' to the repo as well. Jenkins reads this file to determine the actions to run against the repository to build, test, or deploy. It is written using the declarative version of the Jenkins Pipeline DSL.
Read Next: Integrate Kubernetes and Docker by automating the process of running containerized applications developed in Docker using Kubernetes.
References:
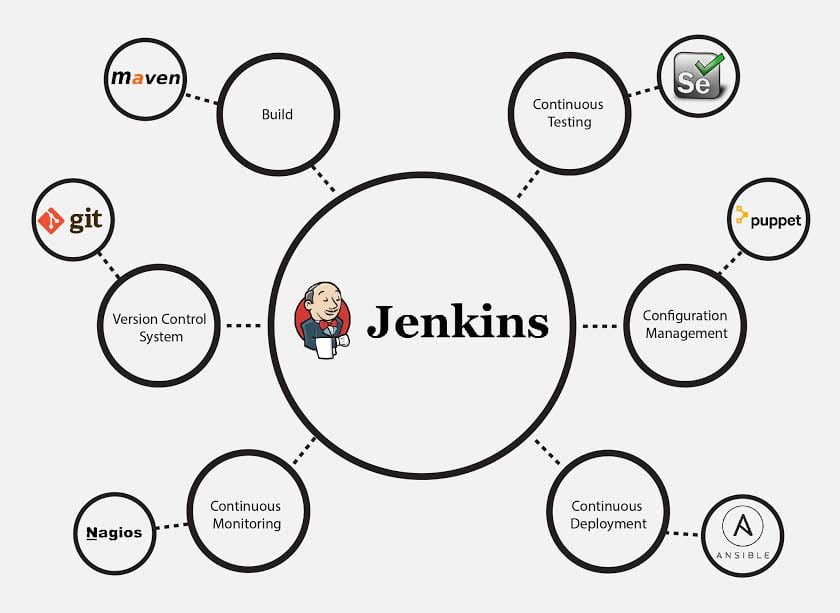
Continuous Integration (CI) and Continuous Development (CD) are the major areas in DevOps culture. Thus, Jenkins is a popular open-source Continuous Integration server written in Java which helps us to automate the process of Software Integration. Jenkins has over 1000 plugins that are available freely. These plugins help to integrate with various software tools for better convenience. We can hook it up with most of the repositories like SVN, Git, Mercurial, etc. For example, look at this image below:
[1]A huge project which needs Testing, Management, Deployment & Monitoring is manually not feasible as this would take a lot of time, effort and integration complexity. Jenkins is a powerful platform to carry out these activities automatically and lets us know if there are any bugs at the earlier stage of integration.
In this blog, we will learn to setup Jenkins at our local machines, create a CI pipeline and check how it helps with automation by taking a sample project.
A. Installation & Setup of Jenkins :
Software requirements: Ubuntu 22.xx
- At your Terminal, first update the existing packages by running a $ sudo apt update
Next, add the repository key to the system using the command: $ wget -q -O - https://pkg.jenkins.io/debian-stable/jenkins.io.key | sudo apt-key add -
After the key is added the system will return with OK. After which append the Debian package repository address to the server’s sources.list using the command: $ sudo sh -c 'echo deb http://pkg.jenkins.io/debian-stable binary/ > /etc/apt/sources.list.d/jenkins.list'
Oops! I received an error.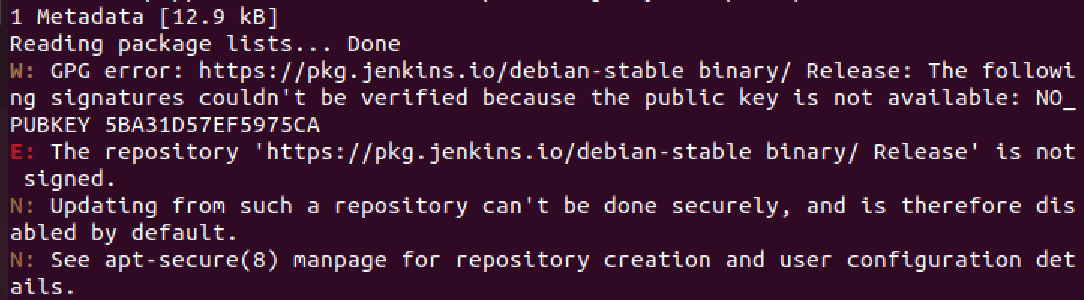
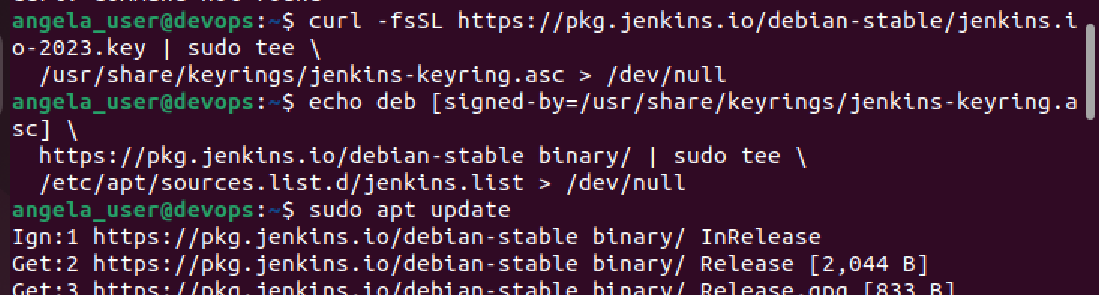
- In case of an error as shown above, use the following two commands to sign a key.
$ curl -fsSL https://pkg.jenkins.io/debian-stable/jenkins.io-2023.key | sudo tee \ /usr/share/keyrings/jenkins-keyring.asc > /dev/null
$ echo deb [signed-by=usr/share/keyrings/jenkins-keyring.asc] \
After both commands have been entered, we’ll run update so that apt will use the new repository.
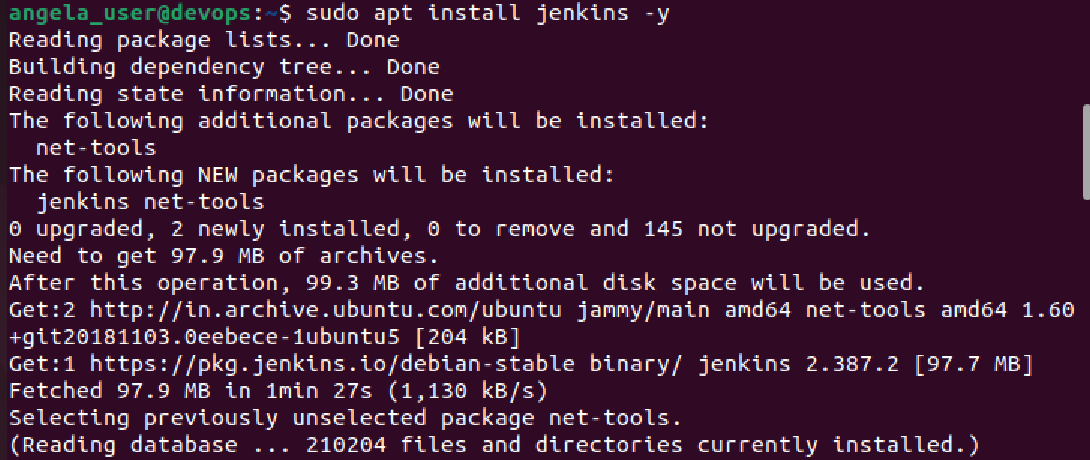
- Finally, we’ll install Jenkins and its dependencies: $ sudo apt install jenkins -y
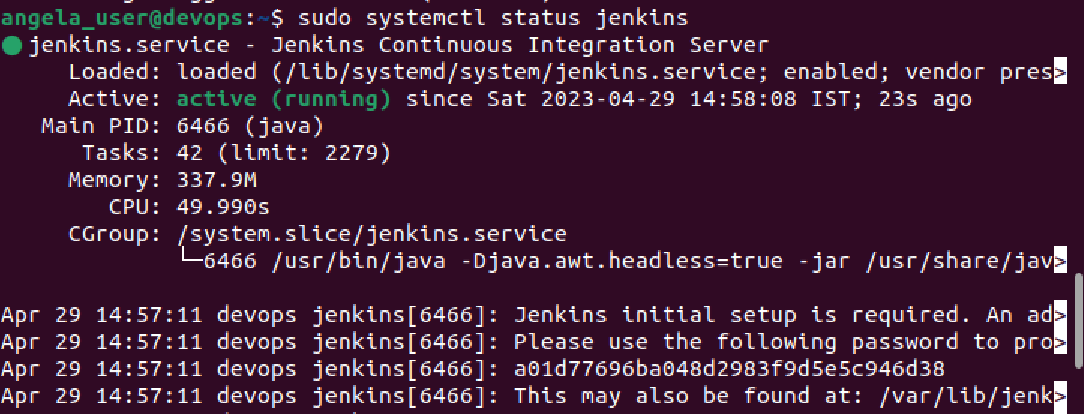
- Once the installation is complete, start the jenkins server- $ sudo systemctl start jenkins
And then check the status whether its active (running). $ sudo systemctl status jenkins
- Check the firewall status and if found inactive, the following commands will allow OpenSSH and enable the firewall:
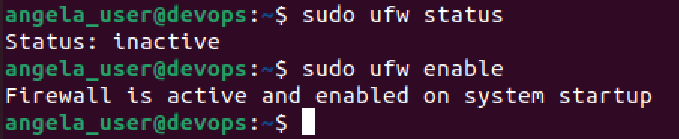
- By default, Jenkins runs on port 8080. We’ll open that port using ufw:

With Jenkins installed and our firewall configured, we can complete the installation stage and dive into Jenkins setup.
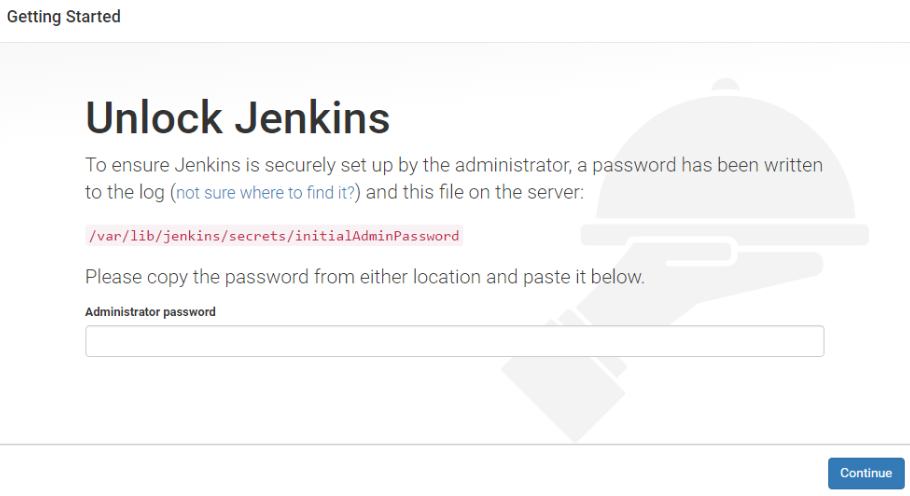
- We need to visit Jenkin at the default address: http://your_server_ip_or_domain:8080. You should receive the Unlock Jenkins screen, which displays the location of the initial password. Copy the 32-character alphanumeric password from the terminal and paste it into the Administrator password field, then click Continue.
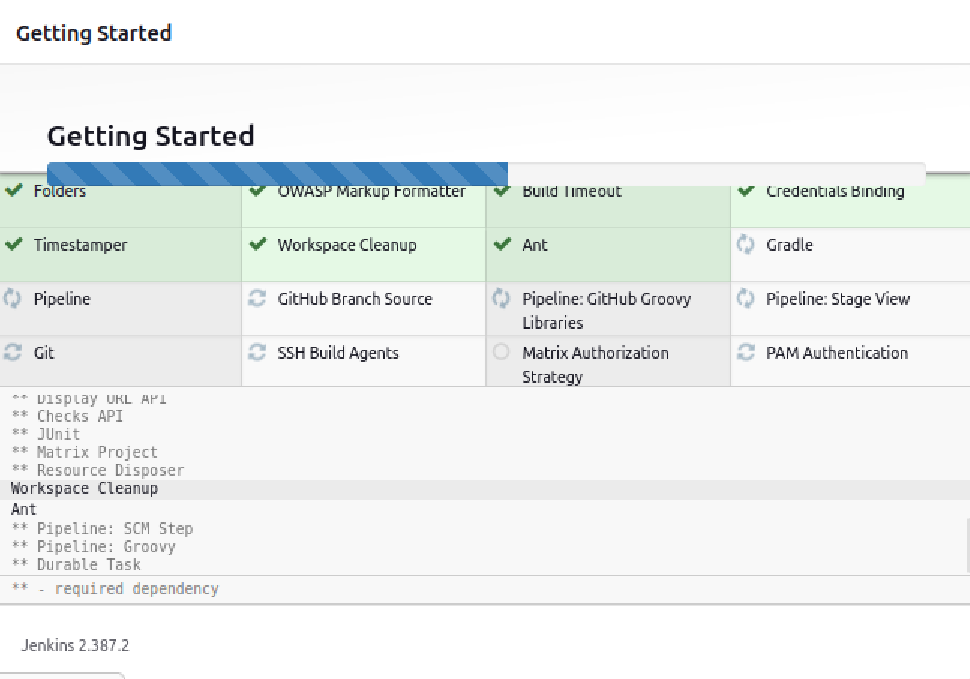
- Next click on 'Install Selected plugins' which will immediately begin the installation process.
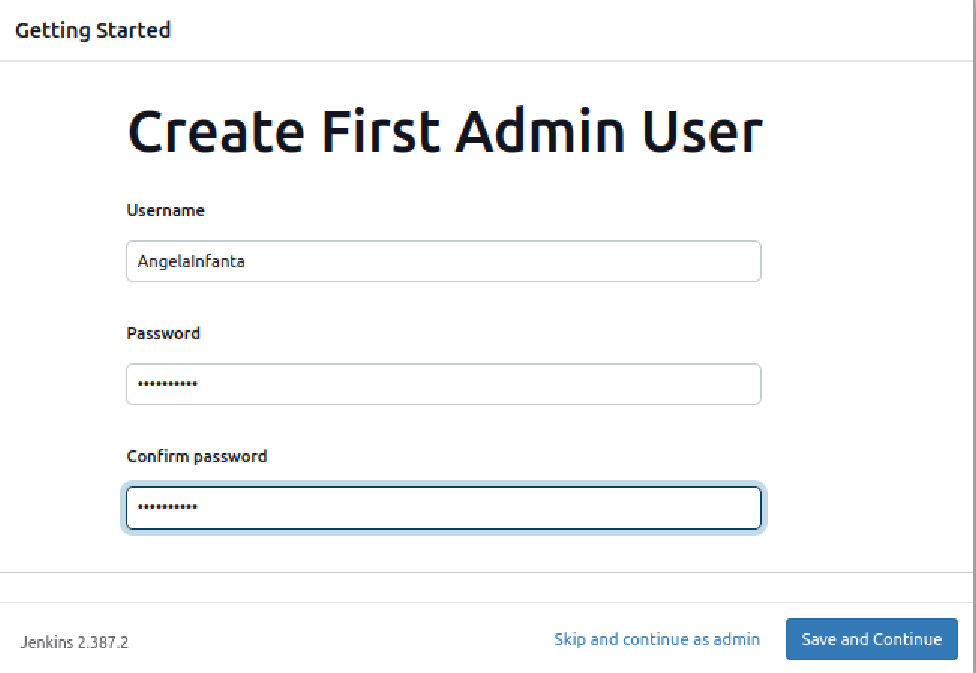
- It’s possible to skip the user creation step and continue as admin using the initial password we used above, but we’ll take a moment to create the user.
- You’ll receive an Instance Configuration page that will ask you to confirm the preferred URL for your Jenkins instance. Confirm either the domain name for your server or your server’s IP address: In my case I choose it to be http://localhost:8080/
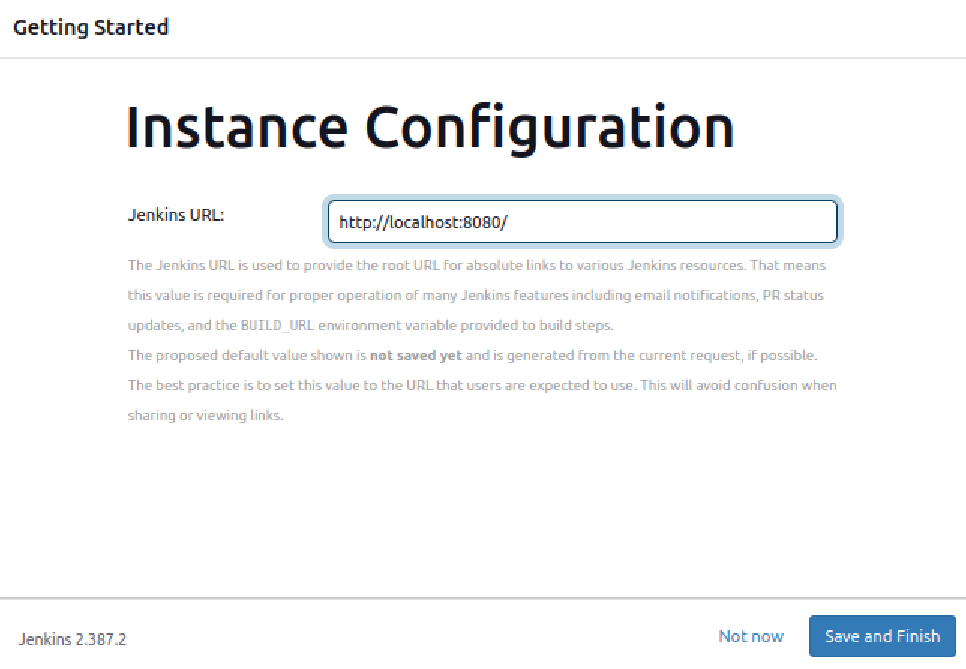
- Once you click on 'Save and Finish', the setup is complete as shown.

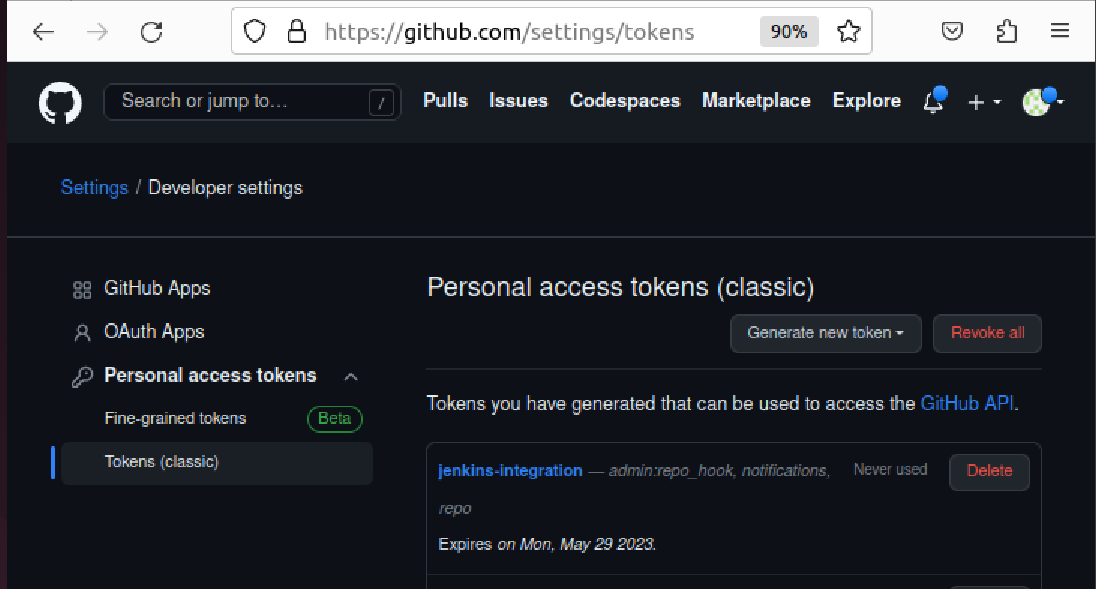
- In order for Jenkins to watch our GitHub projects, we will need to create a Personal Access Token in our GitHub account.
- Go to your github account, click on your user icon in the upper-right hand corner and select Settings from the drop down menu.
- On the page that follows, locate the Developer settings section of the left-hand menu and click Personal access tokens (classic).
- Click on Generate new token button on the next page
- In the Token description box, add a description that will allow you to recognize it later- 'jenkins-integration'.
- In the Select scopes section, check the repo:status, repo:public_repo and admin:org_hook boxes. These will allow Jenkins to update commit statuses and to create webhooks for the project. If you are using a private repository, you will need to select the general repo permission instead of the repo subitems
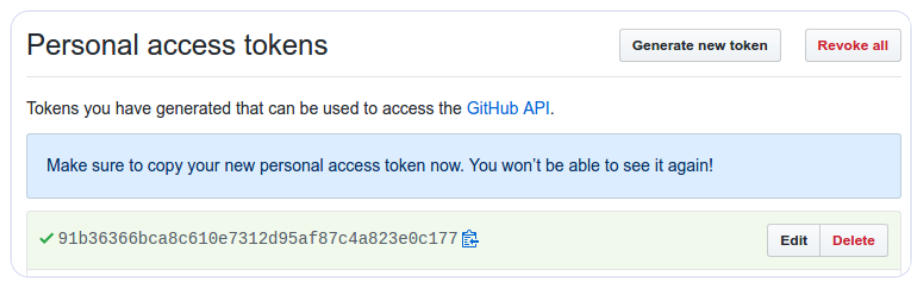
- When you are finished, click Generate token at the bottom. You will be redirected back to the Personal access tokens index page and your new token will displayed. Copy this token for future reference. Note: There is no way to retrieve the token once you leave this page!
- Now go to your terminal and run the following command- $ sudo usermod -aG docker jenkins. This is because, by default the Linux user responsible for running the Jenkins process cannot access Docker.
- You can list the members of the docker group to confirm that the jenkins user has been added successfully typing- $ grep docker /etc/group
In order for the Jenkins to use its new membership, you need to restart the process: $ sudo systemctl restart jenkins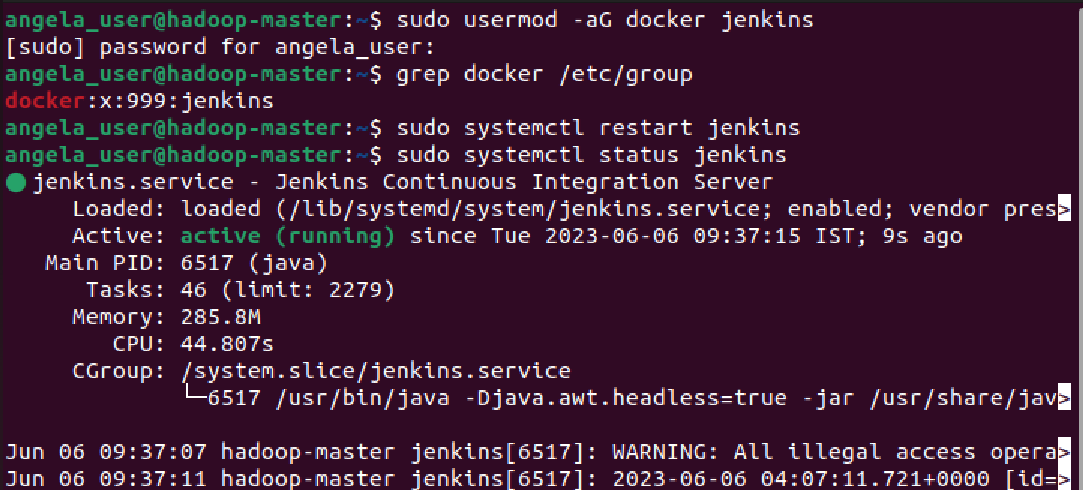
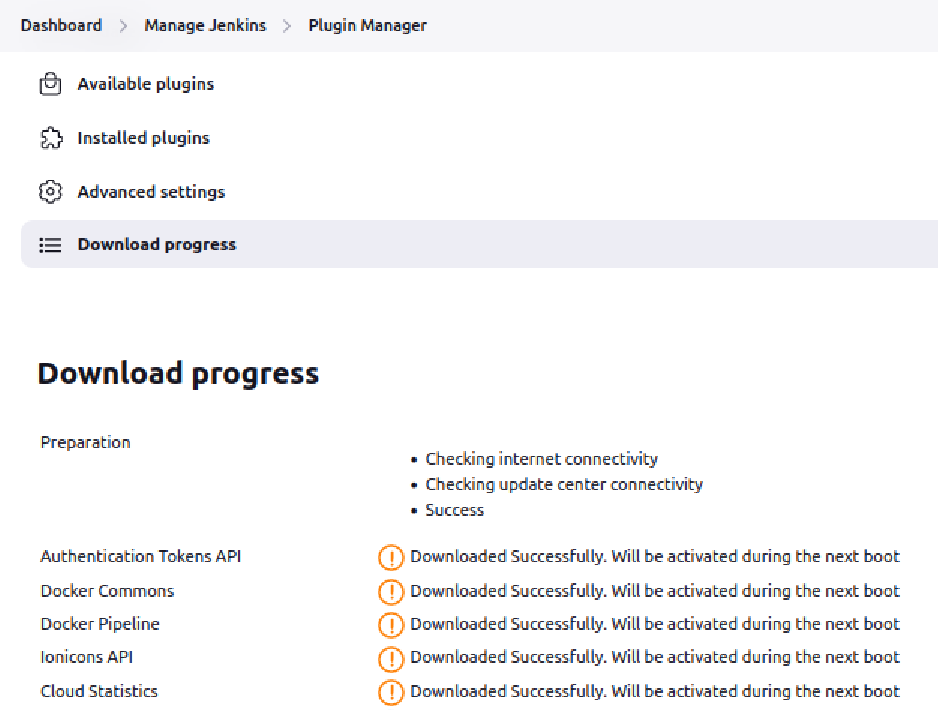
Jenkins can now use Docker to run build and test tasks. - Go to the Dashboard->Manage jenkins -> Plugin manager. See the Available plugins and download Docker for Jenkins. The progress for Downloads will appear.
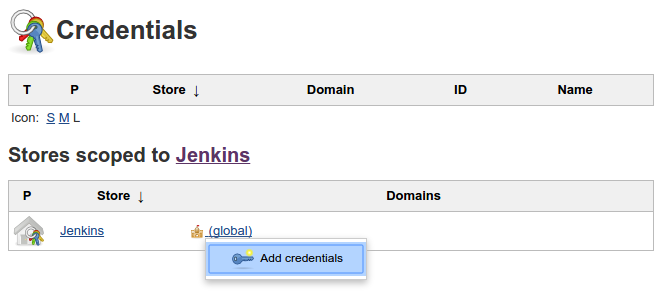
- Now that we have a token, we need to add it to our Jenkins server so it can automatically set up webhooks. Log into your Jenkins web interface using the administrative account you configured during installation. From the main dashboard, click Credentials in the left hand menu. On the next page, click the arrow next to (global) within the Jenkins scope. In the box that appears, click Add credentials.
- Under the Kind drop down menu, select Secret text. In the Secret field, paste your GitHub personal access token. Fill out the Description field so that you will be able to identify this entry at a later date. You can leave the Scope as Global and the ID field blank
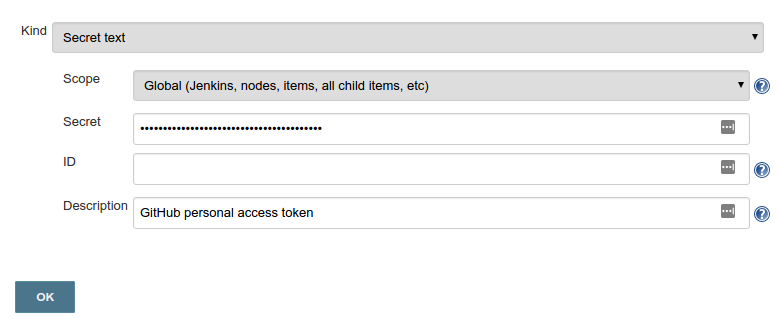
- Click the OK button when you are finished. You will now be able to reference these credentials from other parts of Jenkins to aid in configuration.
- Back in the main Jenkins dashboard, click Manage Jenkins -> Configure System in the left hand menu. Scroll through the options on the next page until you find the GitHub section. Click the Add GitHub Server button and then select GitHub Server. Click the Test connection button. Jenkins will make a test API call to your account and verify connectivity.

Once everything is done, click on Apply and save.
To demonstrate how to use Jenkins to test an application, we will be using a simple “hello world” program created with Hapi.js. Because we are setting up Jenkins to react to pushes to the repository, you need to have your own copy of the demonstration code. We’ve added a 'Jenkinsfile' to the repo as well. Jenkins reads this file to determine the actions to run against the repository to build, test, or deploy. It is written using the declarative version of the Jenkins Pipeline DSL.
- Back in the main Jenkins dashboard, click New Item ->Enter an item name -> Pipeline as the item type.
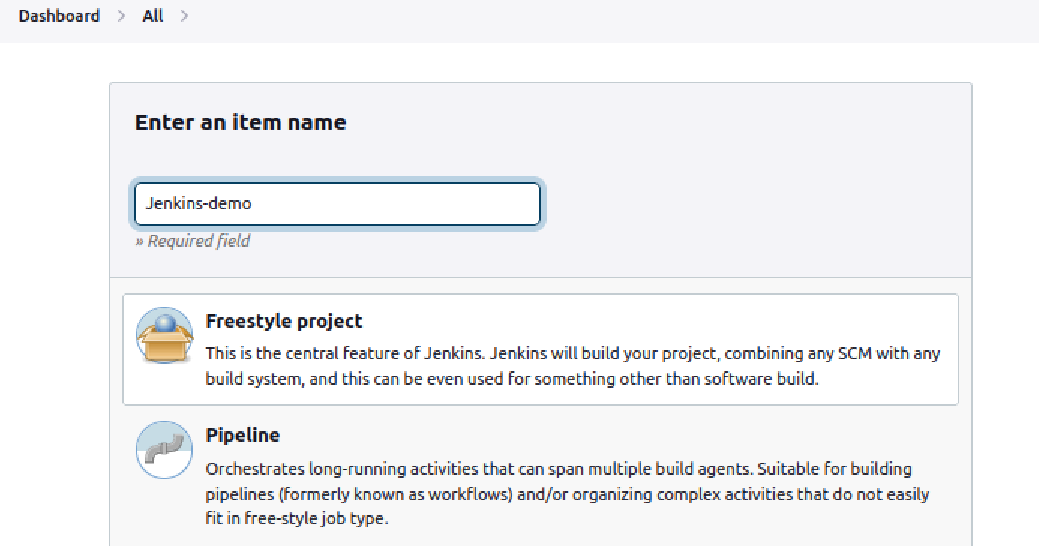
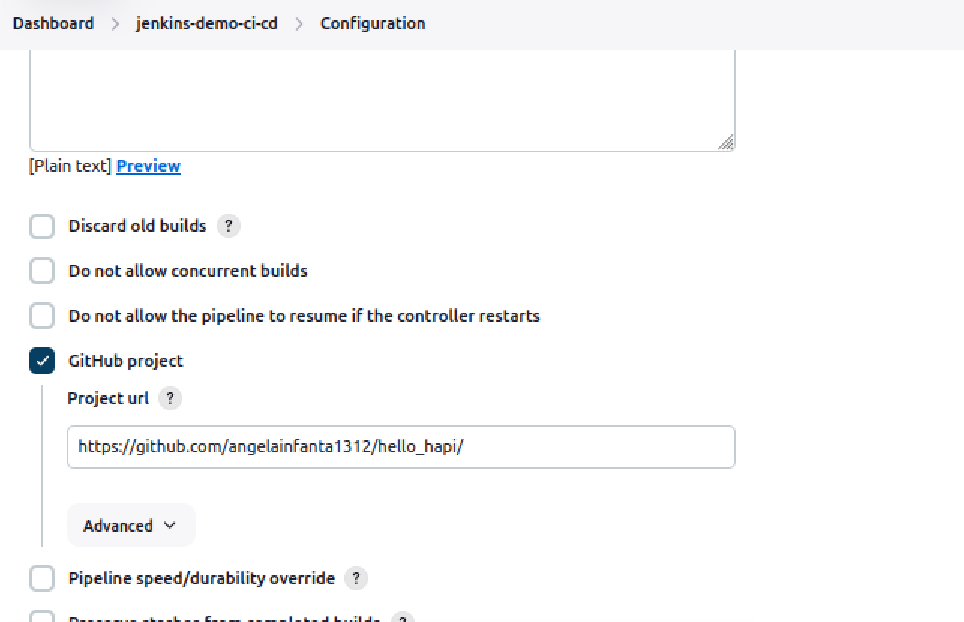
- Click on OK.Then go to your pipeline's configuration and scroll down to checkmark Github project box. In the Project url field that appears, enter your project’s GitHub repository URL. Next, in the Build Triggers section, check the GitHub hook trigger for GITSCM polling box:
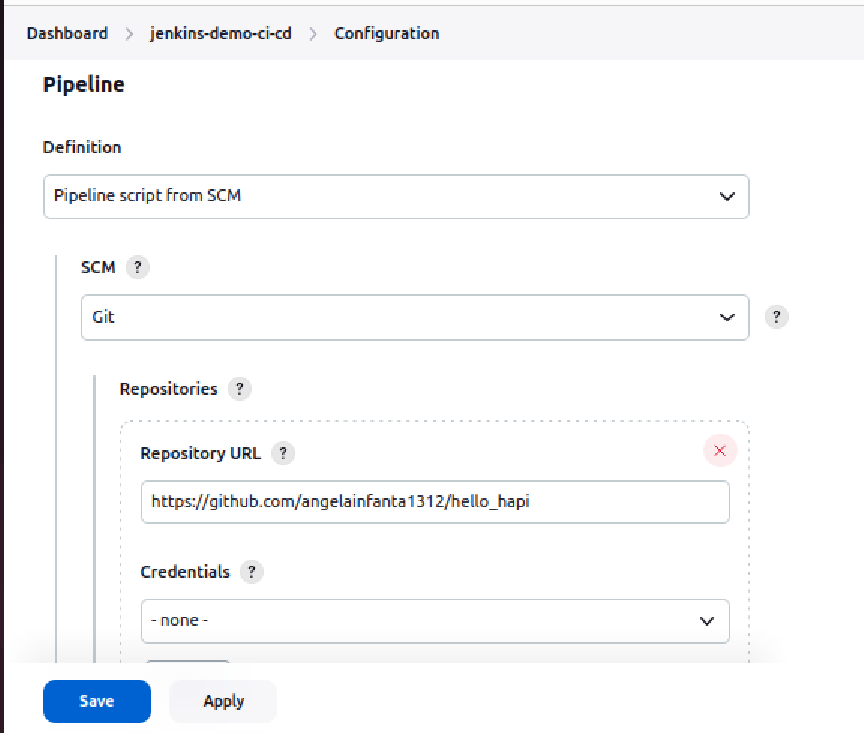
- In the Pipeline section, we need to tell Jenkins to run the pipeline defined in the Jenkinsfile in our repository. Change the Definition type to Pipeline script from SCM. In the new section that appears, choose Git in the SCM menu. In the Repository URL field that appears, enter the URL to your fork of the repository again and click on save.
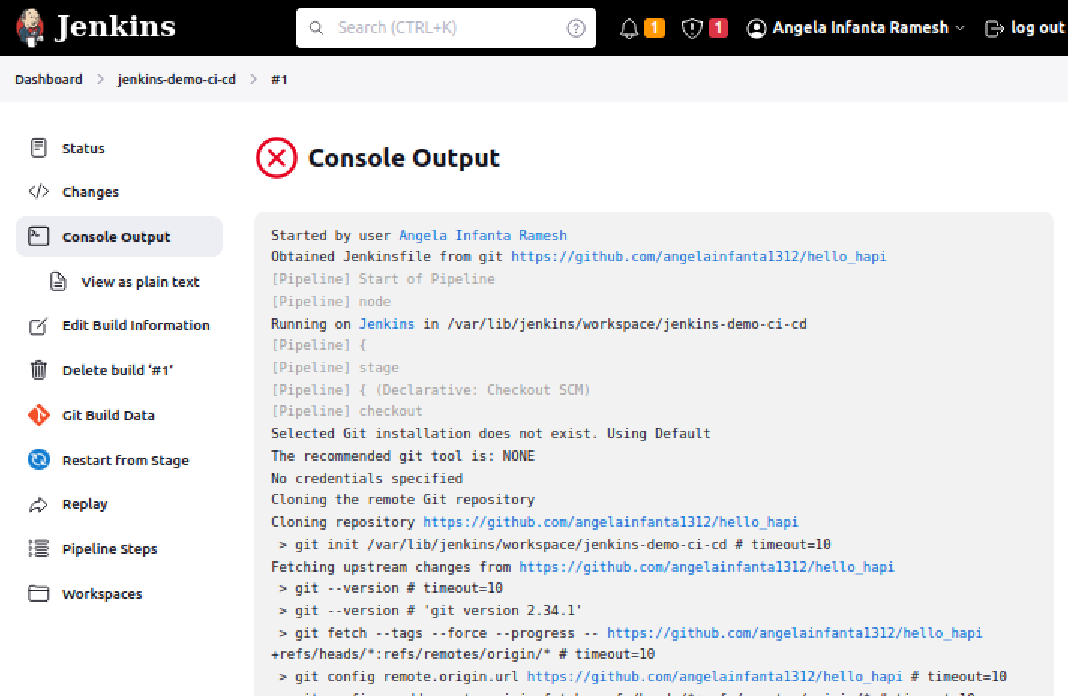
- Jenkins does not automatically configure webhooks when you define the pipeline for the repository in the interface. In order to trigger Jenkins to set up the appropriate hooks, we need to perform a manual build the first time. In your pipeline’s main page, click Build Now in the hamburger menu. A new build will be scheduled. In the Build History box in the lower left corner, a new build should appear in a moment. Additionally, a Stage View will begin to be drawn in the main area of the interface. This will track the progress of your testing run as the different stages are completed.

- The Build and eventual test failed because of internet connectivity issue. In order to check the cause of the build, one can go to the console output
In our case, it shows ERR_SOCKET_CONNECTION_TIMEOUT as seen below.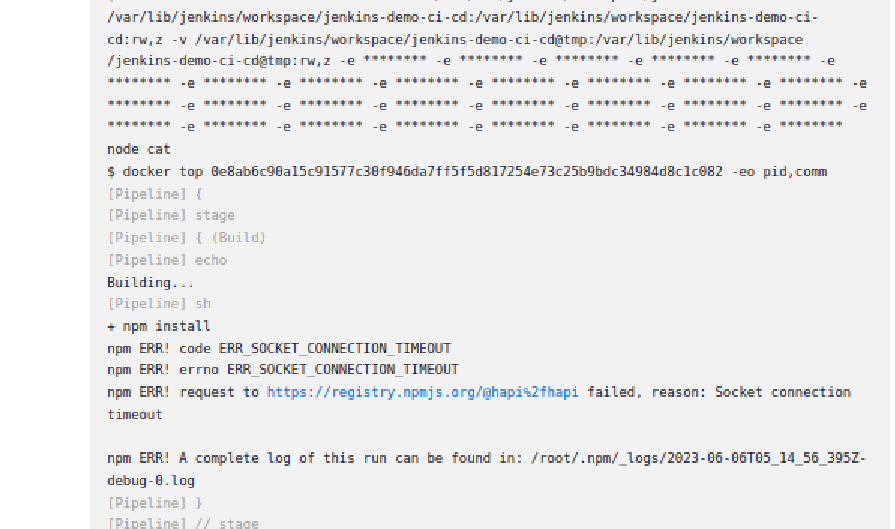
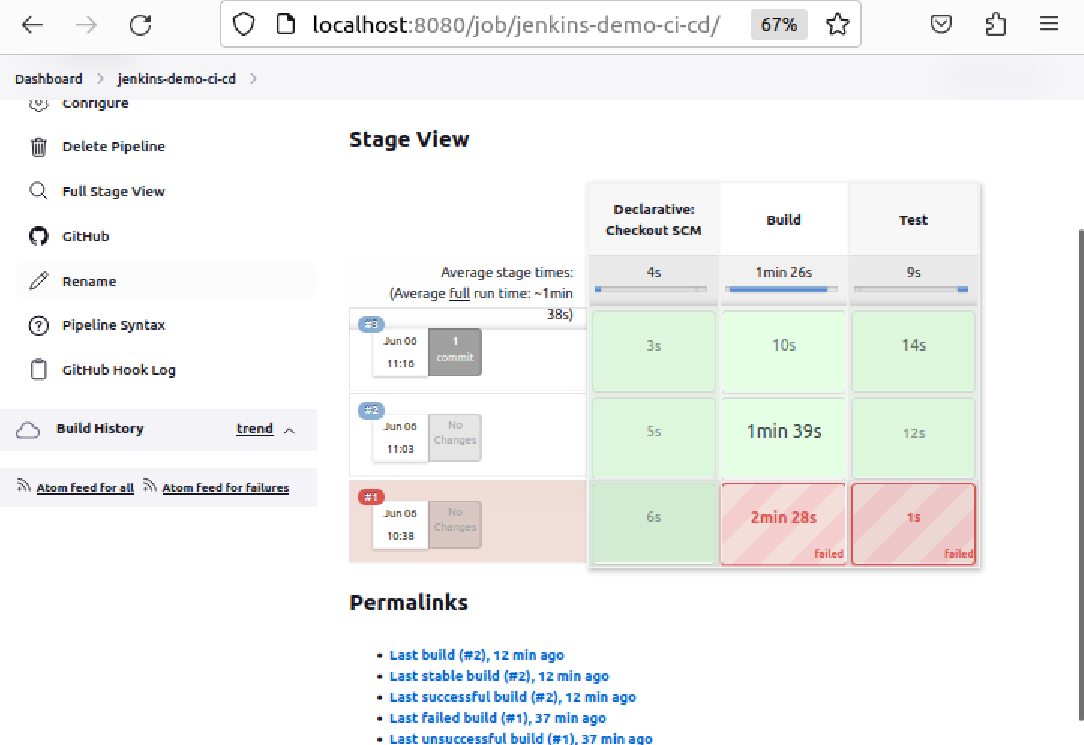
After a retry, the test passes successfully as shown below.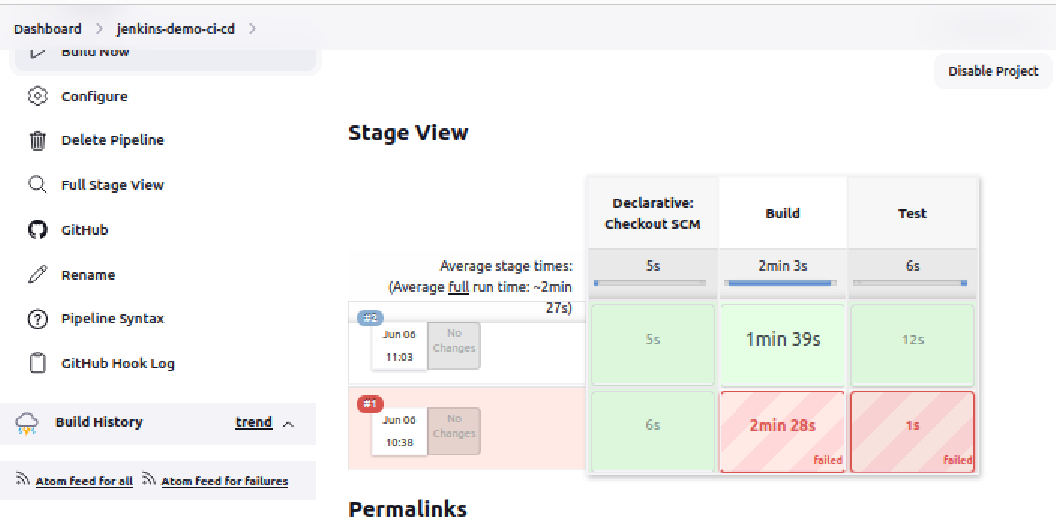
- Now that we’ve built the project once, we can have Jenkins create the webhooks for our project. Click Configure in the left hand menu of the pipeline -> click the Save button at the bottom. Now that the Jenkins has information about the project from the initial build process, it will register a webhook with our GitHub project when you save the page.
You can verify this by going to your GitHub repository and clicking the Settings button. On the next page, click Webhooks from the side menu. You should see your Jenkins server webhook in the main interface.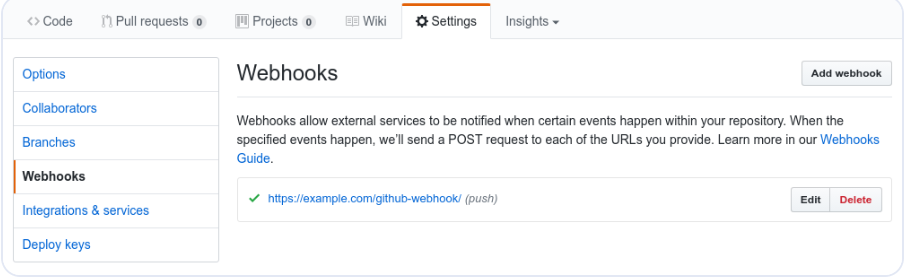
- Now let's add a commit at our github repository and check if this pipeline automatically rebuilds the pipeline for existing features. The screenshot below shows the pipeline after 1 commit, which passes the test successfully.
Read Next: Integrate Kubernetes and Docker by automating the process of running containerized applications developed in Docker using Kubernetes.
References:
- Different plugins available for Jenkins
- Jenkins Documentation: https://www.jenkins.io/doc/